
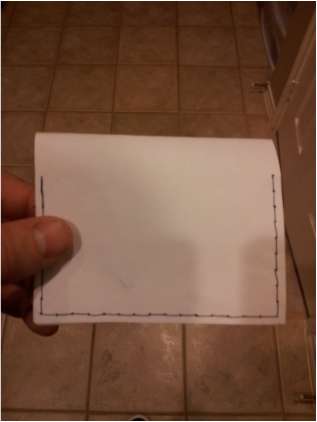
During the weekend surrounding Black Friday, I bought a discounted leather handstitching set from Tandy Leather Factory with hopes of crafting my own wallet. Knowing there were still a few tools needed before I could start, I began researching and buying tools here and there from Tandy, Amazon, and Home Depot to complete my arsenal. My next step was to find a pattern/template to use to cutout and create a wallet from. After mining through multiple websites, I came across a pattern and how-to that seemed perfect. It was for a basic bifold wallet with 4 card slots. I print out the pattern, cut it all out, and handstitched a paper prototype.
Cool, now on to the leather, right?
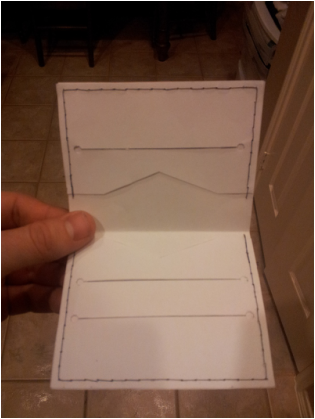
Nope. After looking at the paper prototype for a while, I realized how boring it was. Why make a standard wallet when I can come up with my own design? So for the next few days I sketched, measured, cut out, and threw away a number of ideas.
During this process I realized a couple things.
Cool, now on to the leather, right?
Nope. After looking at the paper prototype for a while, I realized how boring it was. Why make a standard wallet when I can come up with my own design? So for the next few days I sketched, measured, cut out, and threw away a number of ideas.
During this process I realized a couple things.
- I rarely carry cash in my wallet.
- I currently carry too many unnecessary cards.
 |  |
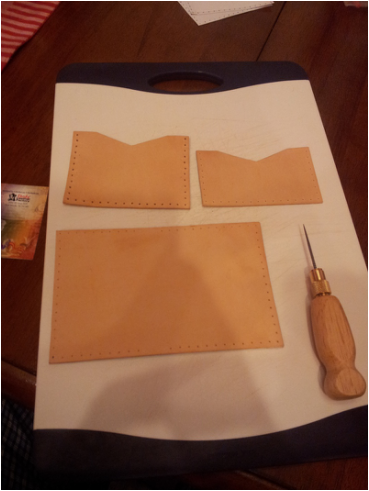
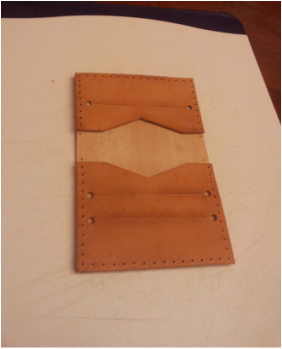
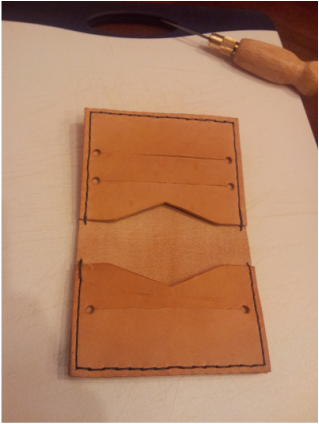
The paper prototype turned out great and I was finally ready to use my pattern to cut out some leather. When I bought my hand stitching kit I also picked up two 8.5" x 11" vegetable tanned leather sheets. It doesn't say on the packaging, but I'm pretty sure they're about 4 oz each.
Time to cut.
Time to cut.
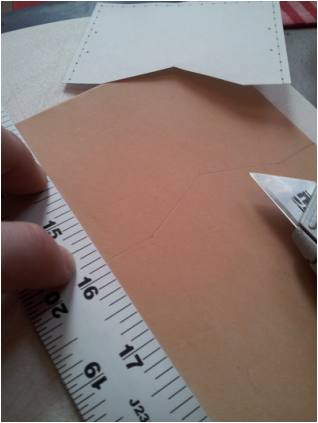 |  |
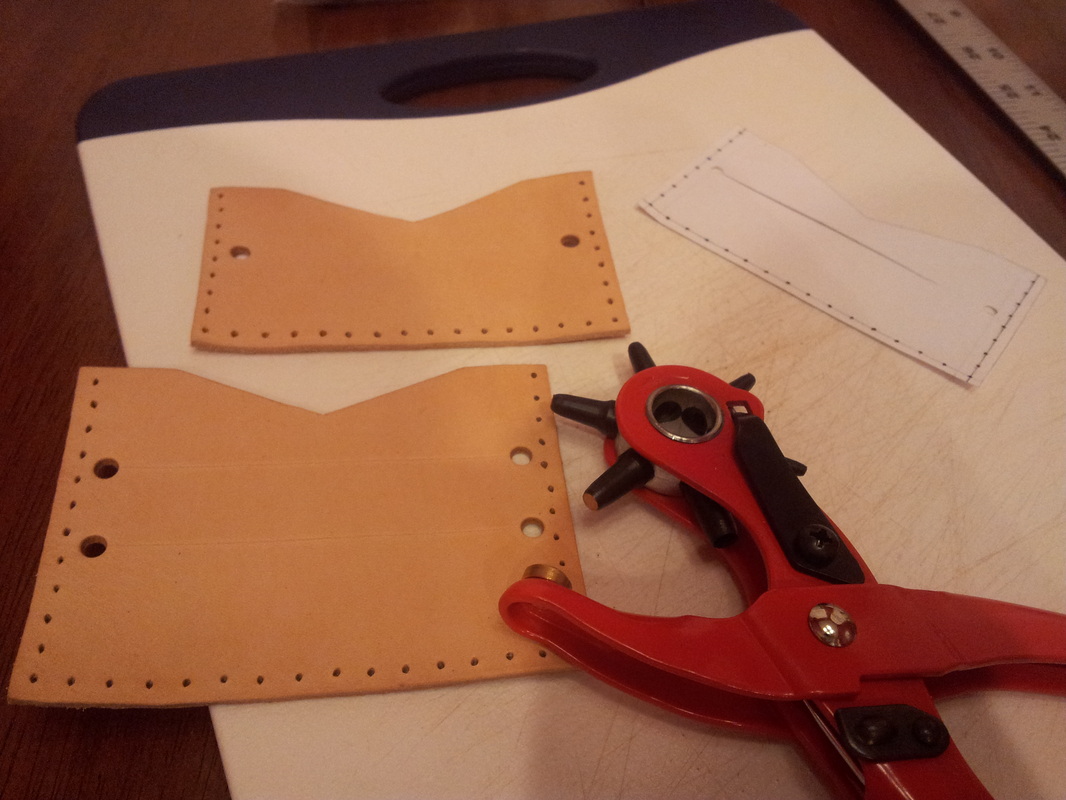
I rubbed some gum tragacanth on the suede (back) side of the leather to smooth it out. I then put the 3 template pieces back onto the leather pieces to mark where the holes would be punched. There are actually a number of ways to mark/punch out stitching holes. Some people use a overstitch spacer that evenly marks where your holes should be punched, but I decided to use a ruler and mark them myself. I'll probably user the overstitch spacer for my next wallet, though. I marked and drove through the holes with an awl a couple of times to ensure they were wide enough for the stitching needles to fit through.
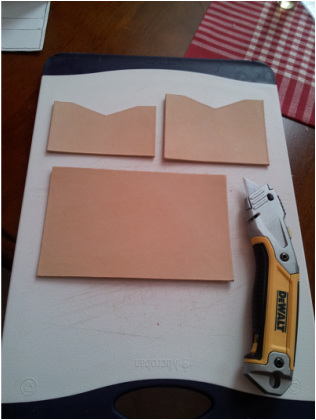
I then used my rotary punch and knife to make the card slots. The rotary punch is by far my favorite tool I've bought. It's just like a paper hole puncher except I feel more masculine using it because, you know, it's leather.
 | 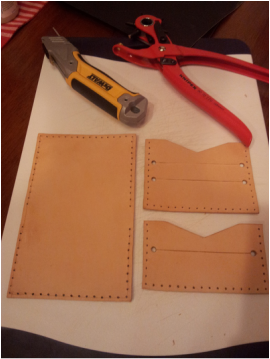 |
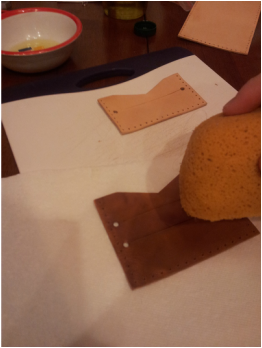
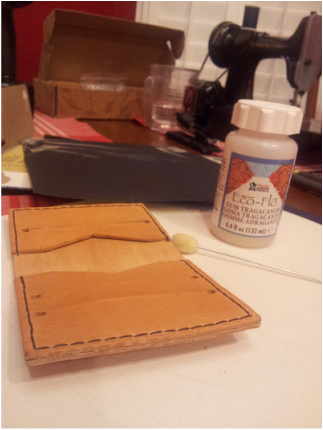
I read it's good to rub a coat of extra virgin olive oil on the grain side (out side) because the leather tends to dry out after all of the cutting and tooling and this help replenish the oils. So, I did just that and allowed the leather to soak it all up. It gives the leather a richer tone as well. I don't have any leather conditioner at the moment, but if I did I would've rubbed a coat of that on after the EVOO dried. Among a number of things, the conditioner will help provide some water resistance to the leather. Before stitching, I rubbed on a thin layer of leather glue to keep the pieces together.
 |  |  |
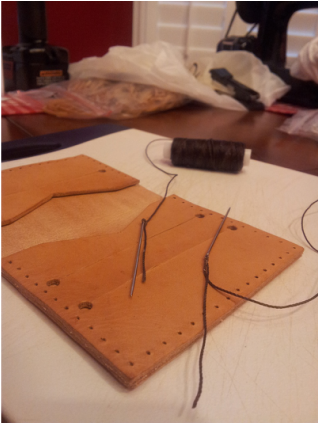
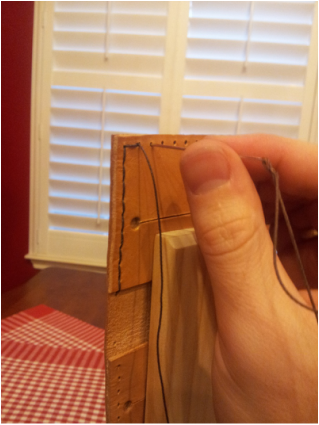
Sewing time.
I used a stitching pony to hold the wallet in place while I used the double-needle sewing method. It basically just acts as a third arm.
I used a stitching pony to hold the wallet in place while I used the double-needle sewing method. It basically just acts as a third arm.
 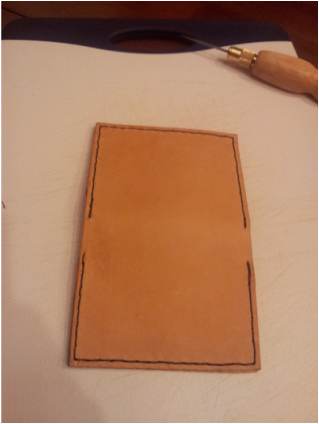 |   |
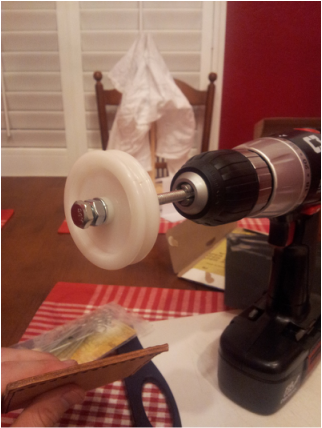
After the hand sewing was complete, I rubbed the edges with 600 grit sandpaper to remove any excess glue. I then added a layer of gum tragacanth along the edges and used an edge slicker to burnish them. I bought a white plastic edge slicker at Tandy Leather and, with the advice and assistance of my older brother, rigged it to hook up to my electric drill. So instead of rubbing the edges by hand, I just turn on the drill and it does the work for me.
 |  |
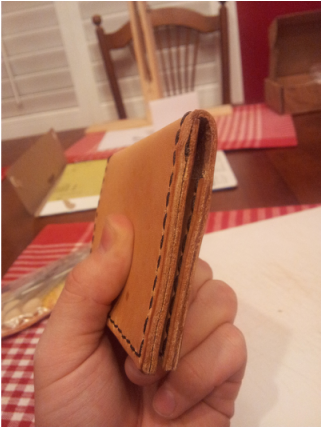 | 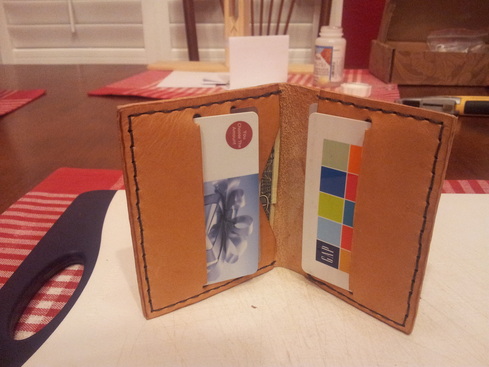 |
All done! There are a couple of steps I forgot to do, but oh well. I think it turned out pretty well for my first leather project. Making this wallet was a lot of fun so I anticipate making more wallets/leather goods in the near future.
